Reflection
This module solidified my understanding of axonometric projection and how it can be used to reveal what is otherwise hidden behind a frontal, flat facade. The flatness of 2D images and the front of any object is often perceived from a subjective point of view because the entire object cannot be observed fully. With 3D constructions and axonometric projection, a more objective point of view can be constructed because both the interior and exterior space is exposed. By projecting the two 2D Mario elevations into each other, a 3D space can be formed from the various elements that presents a possible interpretation of the hidden space within the elevations. From the flat images, what is seen is not all that is there. Whereas in the axonometric projection, this perception is changed by uncovering the full extent of the object and demonstrating the relationship between the inner space and the outer space.
MARIO WORLD 8-2
The elevations of my given Mario world presented a stark contrast that stumped me at first - the first elevation was a massive wall of dirt, dominating the scene, while the second featured a few mountain-like structures in an otherwise empty elevation. How was I ever going to create a cohesive piece with such different elevations?

Elevation 1
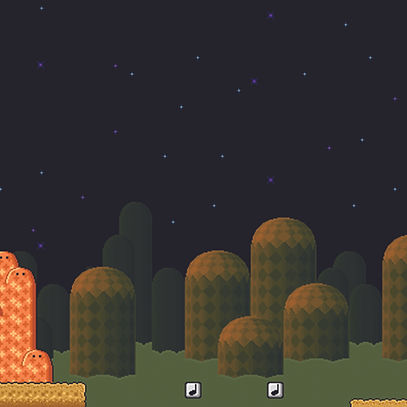
Elevation 2
The answer was in the axonometric and the elements...
ELEMENTS


Because there were elements that appeared in both elevations (e.g. the checkered "mountains", the orange "lava" columns), I could fuse the two elevations together by using these connector elements to blend them together. By bleeding some green pipes into the "mountains" and the green, translucent fog into the lower depths of the world, there was no longer an obvious divide between the two elevations.
AXONOMETRIC
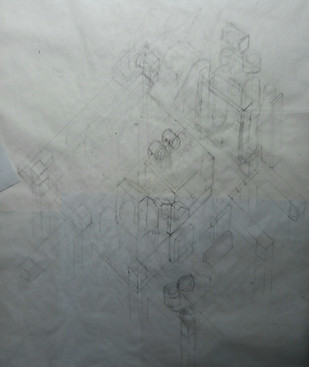
Projecting the world in an axonometric was quite difficult at first because of all the required conventions. I was at first obsessed with getting the angles and lengths all perfect, which was unfeasible because I had not even planned what was in my world.
My initial idea was to have one half of the world to represent a chaotic, dense industrial scene derived from Elevation 1, while the other half resembled a peaceful mountain scenery of Elevation 2. I realized that this would make the whole world very imbalanced and so resorted to something else...
Initial rough drafts
To give the space that both elevations needed, I positioned one elevation above the other so that both would have the full square to develop whilst still being part of the same world. It made sense to have the more floaty, sparse elevation on top that would contrast its denser, busier lower half.
By doing this, distinct layers immediately materialized - the foundations of the steel pipe grid, the hustle of the industrial midsection and the airiness of the floating "mountains". This called for elements to "leak" into each layer to create a more cohesive world, with "mountains" found hidden in the depths of the foundations and pipes protruding from the upper atmostphere.
As a result, the whole world became more balanced, but to keep that sense of imbalance that is present between the elevations, I decided to pull out certain elements, like the steel foundational pipes, to distort the world ever so slightly.

Final axonometric linework
PROCESS
Click to scroll through zoomed-in versions!


Layer by layer, colour by colour, the world was realized (with a few changes):
Fog
Perhaps the biggest change was the addition of the green "fog" that can be seen mainly in the lower section of Elevation 2, which I interpreted as a floating cloud of sorts that would permeate the world.
Night
The addition of a black background to represent the night setting of the elevations also gave the world more character, as now it felt more isolated and mysterious.
Extending / Slicing
Some of the ends of the steel pipes were extended to balance out the composition, while other green pipes were sliced open to contrast the full-length pipes in the midsection. Overall, they added more visual interest.
Drop Shadow
To reinforce the floating aspect of the uppermost layer, drop shadows were added to give a sense of weight and to distinguish the distance between the upper and lower elements.
FINAL WORLD
Click the picture to zoom in!

Final edits include adding a scale bar and reducing the exposure to play into the subdued, mysterious atmosphere and the night settings.